How To Start A WordPress Blog on HostGator And Make A Side Income
Many of our friends and readers of our Blog have asked us questions about how to start a WordPress Blog for their own personal stories as well as businesses. We started off as newbies in the Blogging world and we have been working on Fat Starfish nearly everyday publishing content, interacting with readers, writing proposals and many more.
While we do not want to scare you off, Blogging is actually a full-time commitment. And if you are interested in how you can make Blogging a side income for yourselves, you have to, of course, KICK START your own blog and experience it.
Today we are going to share with you a step-by-step guide that will show how easily you can launch your own WordPress Blog on HostGator just like us in a matter of minutes.
8 Reasons Why You Should You Use HostGator for your WordPress Blog
- HostGator is an Award Winning Hosting company
- HostGator is affordable
- HostGator is easy to use. So far we have created more than 3 blogs through HostGator with no problems
- HostGator makes it very easy to create a WordPress blog with just a few simple clicks
- HostGator web hosting offers 24/7 technical support and a 99.9% uptime guarantee
- HostGator offers cheap web hosting
- HostGator has a 45-Day money back guarantee
- Most importantly if you want to monetize your blog, you will want need to be self-hosted. And guess what, You will be self-hosted when you purchase a web hosting plan through HostGator!
Below is our step by step instructions on how to start a WordPress blog on HostGator. We also have a HostGator coupon code, “FATSTARFISH” for 25% off HostGator just for reading this review. Do share it with your friends!
To start the process, you will first need to head on over to HostGator to do any of this. This is one of the best blog hosting companies around and we use it for all our Blogs.
If you plan on starting a blog on HostGator, continue below:
Register The Perfect Domain Name For Your Blog
The first and most important process when starting a WordPress Blog on HostGator is to come up with a Perfect Domain Name for your blog. For us, our domain name is www.fatstarfish.com. Avoid free Blog sites and opt for .com or .sg domains for your blog. It would be easier to monetise your Blog in the future.
- Tip: Take your time and think through the Domain Name you want for your blog. As this will be permanent and cannot be changed
Most people would buy their Domain Names via NameCheap and that is what we have done for our Blog. So head to NameCheap and buy your Domain Name and then head to HostGator for your hosting.
Find a domain starting at $0.48
powered by Namecheap
Alternatively, you can just buy your Domain directly from HostGator. There are pros and cons to this. Let’s just say we prefer not to put all our eggs in one basket. We would recommend you to buy your Domain Name separately via NameCheap. 🙂
Purchase Web Hosting For Your Blog
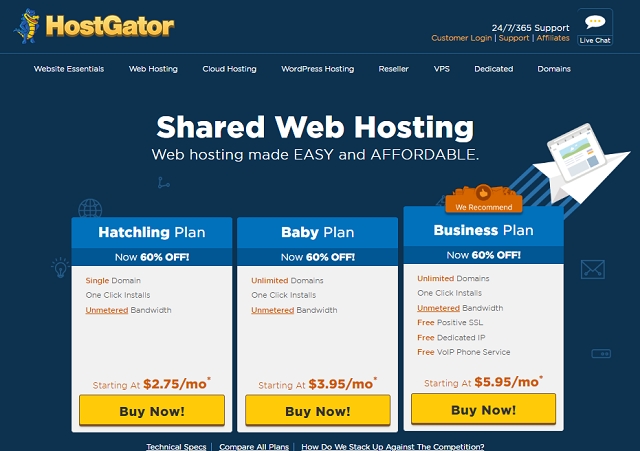
HostGator web hosting plans are CHEAP. Plans start at just USD$2.75 per month.
- Tip: Enter HostGator coupon code “FATSTARFISH” when checking out to receive a 25% discount!
With the HostGator Order Wizard, you will register your new domain or enter the domain that you already own. You will then confirm your package type and billing cycle.

Choose the right plan for you. We recommend the Hatchling Plan if you are just starting out. 🙂
If you are just starting out and have just one Blog, opt for the cheaper Hatchling package. For Hosting, you can always upgrade your plans later when you have more Blogs.
You will then need to choose your username and security pin. Next comes your billing information.
You will save more money if you choose a longer plan. We usually recommend a plan that is one year or longer. Most of our friends whom we advised usually opt for a 3-year plan. Remember that running a Blog is a marathon and not a 100-metre short sprint.
Connect Your NameCheap Domain to HostGator
Once you have bought your Domain through NameCheap, you will need to connect your domain to your web hosting account. Namecheap has a full support page for setting nameservers for your domain names.
Don’t let this process scare you. Take your time and read through. It is actually very easy. You are halfway there to start your Blogging Empire!
Here are the steps to modify your Nameservers when you are using Namecheap for your Domain and HostGator for your hosting:
- Login to your Namecheap account and go to ‘Manage Domains’.
- Click on the ‘Domain’ you would like to edit
- Click on ‘Transfer DNS to Webhost’ (or Domain Name Server Setup) to set up the nameservers for your Domain
- Select ‘Specify Custom DNS Servers’ (Your own DNS Servers) option and enter the nameservers accordingly
- Click ‘Save changes’
The Custom DNS servers for Hostgator will look something like this “ns1234.hostgator.com.”
Install WordPress at HostGator Cpanel
Next, once you set up your account, you will have to check your e-mail. You should receive an e-mail with your account information so that you can log in. You will then click on the Control Panel Link you were given. This is your “cPanel.”
- When in your control Panel on HostGator, scroll down to “Software/Services” and click on “Quick Install.” QuickInstall is where you will install WordPress. Best of all, it’s free!
- After you click on Quick Install, you will find “WordPress.” Click on it.
- Click “Continue.”
- Here you will click on the domain that you want to install WordPress on. You will want to enter your admin email, blog title, admin user, first name and last name.
- Then click on “Install Now.” On the next page, you will see a message. Make sure you save your username, password, and link to your admin area.
Now It’s Time To Produce Content for Your Blog and Start Your Blog Empire!
Congratulations for taking the first step to creating your own WordPress Blog on HostGator! It is important that you constantly create high quality, informative and engaging content for your readers.
You can also start designing your Blog with the various themes available on WordPress. Try out the free themes that would match your preference and style.
This will, of course, take time, effort and money. Take your time and enjoy the journey.
We will create more Blog Posts soon on how to Register Your Business as well as tools/resources to help you in your Blogging.
If you found this post helpful, please click on any of our affiliate links. If you enter HostGator coupon code “FATSTARFISH” then you will save an additional 25% on your bill.
Do you have any questions on how to start a WordPress blog on HostGator? Comments Below.
*This article contains links to Affiliates which Fat Starfish receive a percentage of sales with no additional costs to you. Help us maintain this website by buying from our links. Thank you for your support!


